Monday, December 17, 2012

Cookbook Review: The Epicurious Cookbook

I know I tout Canadian Living a lot on this blog, and they are fantastic, but I do use other resources, too.  One of them is Epicurious.com, which has one seriously bad-ass database for pretty much anything you want to cook or learn how to prepare.  They also have the catalogue of recipes that come from Bon Appetit Magazine and the now-defunct Gourmet Magazine, both of which I used to subscribe to (I don't subscribe to Gourmet anymore because it's defunct and Bon Appetit wasn't quite doing it for me anymore).  And this fall, Epicurious came out with its first ever cookbook: The Epicurious Cookbook.

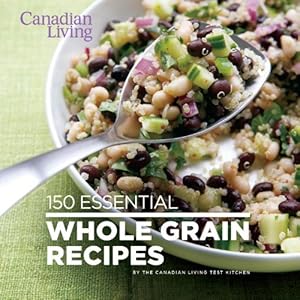
At 400 pages, it's a bit of a tome, but it's a very attractive tome, with a bright red cover and lots of food porn photos between it's covers.  The chapters follow the seasons, starting with spring, and taking into account seasonal ingredients and seasonal fare, and all recipes come with a little blurb describing the dish etc.

I really liked the layout of the book.  Each recipe has its own page, and the ingredients are in one column with the directions in a facing column.  Most recipes are accompanied by scrumptious-looking photos, which of course everyone who is into cookbooks loves.  For more complicated recipes, the ingredients and instructions are broken down into steps for elements of the dish which is useful for planning and organization.  There are also a lot of tips about how to do certain steps ahead of time if you're preparing things in advance.  At the end there are menu ideas.

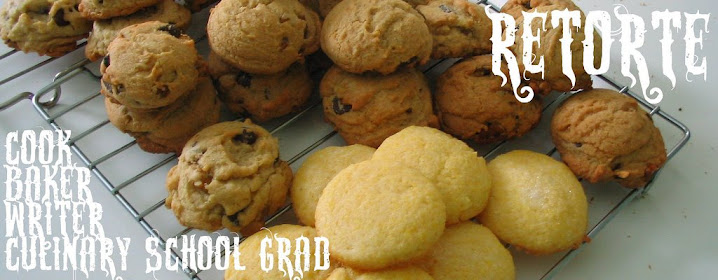
Cookies: Banana nut and Amazing Chocolate Chip Peanut Butter
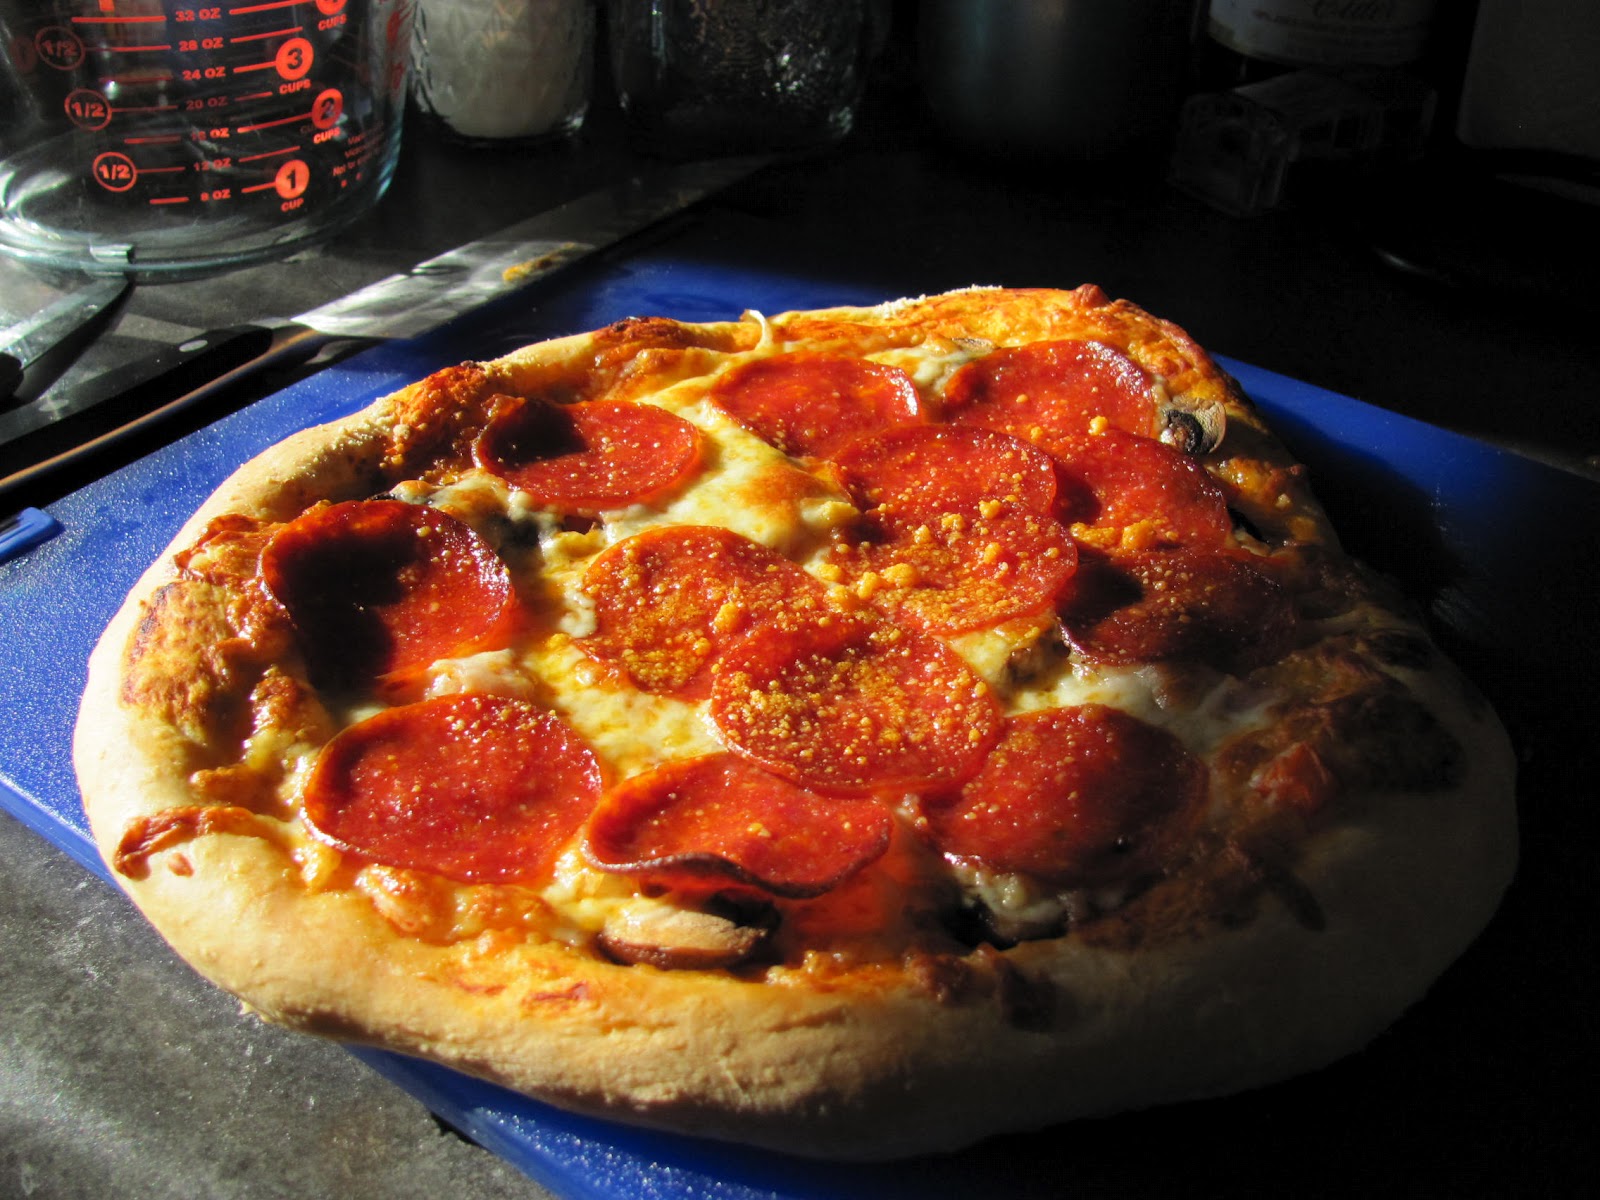
Black Bean & Tomato Quinoa
The recipes look great, as one can expect from a site of this calibre.  I made five recipes myself, three of them cookies.  I made the Dark Chocolate Cherry Oatmeal cookie recipe on page 199 (though I don't have any cherries, so I replaced them with dried cranberries); the Banana Nut Oatmeal cookie recipe on page 284 (this was a hit at home); and the Amazing Chocolate Chip Peanut Butter cookies on page 283 (and they were amazing and I WILL be making them again because they were so good!).  Additionally, I made the Extreme Granola with Dried Fruit on page 298.  This was great granola!  I really enjoyed it.  Finally, I made the Black Bean and Tomato Quinoa on page 70.  Again, this was great and I'll definitely keep this recipe in my repertoire.  It was a very simple, tasty salad with clean flavours.  I'd add some feta cheese to it next time, though, just for some variety.  It made a healthy amount and I felt quite virtuous eating it because it's a nutritious, low fat dish.  I love lime and cilantro, too.

This is definitely a keeper cookbook, and I have plenty more recipes bookmarked that I must make.  For instance, the Salted Caramel Ice Cream on page 87 looks ridiculously amazing, and the Chicken Chili on page 251 looks like a great, low cost meal with a lot of bang for your buck as it uses a rotisserie chicken from the grocery store, which for some reason are always a few dollars cheaper than buying a fresh chicken and roasting it yourself.  And those are just a couple of what I intend to make out of this cookbook.

I for sure recommend this book, and it's Christmastime, too, so it'll make a great gift for the foodie on  your list!


Friday, October 19, 2012

Cookbook Review: 150 Essential Whole Grain Recipes

If you're familiar with this blog, you'll know that I'm a big fan of Canadian Living Magazine and that I'm a long-time subscriber.  Their recipes are pretty much fool-proof and I use them a lot in my kitchen.  And lo and behold, they have a new cookbook out that focuses on something I could definitely use more of in my life, whole grains.  It's called 150 Essential Whole Grain Recipes, and it comes to us via the vastly experienced staff at the Canadian Living test kitchen.

The book is divided into six chapters: Whole Grain Basics, which covers whole grains are and talks about health benefits and gluten free grains; Wheat, Spelt, and Kamut; Brown Rice and Wild Rice; Buckwheat and Rye; Quinoa, Corn, and Millet; and Barley and Oats.  If you are a person who cannot eat gluten, you'd probably really appreciate this book as it provides a lot of great gluten-free recipes and wheat alternatives.

I personally have made five recipes from this book so far.  First came the Whole Wheat Pecan Waffles on page 16.  Loved them, but then again, who doesn't love waffles?  For a indulgent treat one night, I made the Sweet Chili Popcorn on page 207. Loved it!  Though it could have used a bit more kick; perhaps I'd add some cayenne the next time I make this.  But it was basically like caramel corn with a chili-salt flavour and it was a really great accompaniment to a movie night. I made the Oatmeal Scones on pate 253, only I added fresh cranberries to the mix since it was near Thanksgiving and there were fresh cranberries to be had.  I love a good scone, and I'm happy to say that this recipe is a keeper.  It was also a hit with my roommate, who is also a  lover of a good scone. I made the Whole Wheat Chocolate Chip Cookies on page 255.  These came out quite dense and a little drier than I prefer my cookies to be, but they were a nice treat and I felt like I was eating something healthier for a chocolate fix.  My eight year old roommate really liked them, too.  Finally, since I am a quinoa fan, I made the Black & White Bean Quinoa Salad on page 181.


I made some substitutions, though, since I don't particularly like navy beans or cucumber.  So I put in a can of chickpeas instead of the navy beans and I diced up a green pepper instead of the cucumber. I also omitted the jalapeno pepper since I don't like those either.  But the dressing for this was very good and the end result was quite delicious!  My roommate liked it, too, and it made enough so that I could have a few meals out of it.  I will go back to this recipe again and again, I think.

Apart from these recipes I made, I have a whole bunch bookmarked in the book for future reference.  There are quite a few bread recipes I want to try and the Chunky Chili Corn Bread Cobbler on page 162 is calling to me!  I just have to wait until I can get a roast of beef at a decent price.  For you vegetarians out there, there are plenty of recipes that would suit a veggie diet and even a vegan diet.

This is a great all-round cookbook with a lot of yummt stuff in it, and as is usual with Canadian Living recipes, they all turned out how they were supposed to without any issues.  I definitely recommend this book and will be keeping it in my already overcrowded cookbook bookcase!


Sunday, May 20, 2012

Cooking with Betty Crackpot: Apple Crisp

This is one of the easiest, satisfying desserts you can make and the versatility with it is huge.  I chose to make this particular recipe because my young, almost eight year old roommate, R, had claimed that she'd never had apple crisp before.  If she had, she said it wasn't that memorable.  Well, I wanted to change her life with a memorable apple crisp and I thought Betty would for sure come through for me, since this is a basic, but delicious recipe.  NOTE: I don't normally make my crisp this way, but whatever.  I stayed true to the recipe for the sake of the series!

Apple Crisp, from page 177 of Betty Crocker's Cookbook, 1969 version

4 cups sliced pared tart apples (about 4 medium)
2/3 - 3/4 cup brown sugar, packed
1/2 cup flour
1/2 cup oats
3/4 tsp cinnamon
3/4 tsp nutmeg
1/3 cup butter or margarine, softened

Heat oven to 375F.  Grease square pan, 8x8x2".  Place apple slices in pan.  Mix remaining ingredients thoroughly.  Sprinkle over apples.  Bake 30 minutes or until apples are tender and topping is golden brown.  Serve warm and, if desired, with light cream or ice cream.

I thought this was pretty good.  It was definitely crispy and crunchy.  The flavour and texture was great.  I served it with a bit of whipping cream.

R's verdict: it was "OK."  Well, I guess I didn't change her life after all. 

R's mom, T, loved it though.  We almost ate the whole pan that night.

Saturday, May 19, 2012

Lunch at Characters Taverna

Last weekend here on the Wet Coast was gorgeous weather-wise, and perfect for patio eating.  I went into the city to hang with my SIL for an afternoon, and she really fancied Greek food.  There is a string of Greek places on Davie St. in the Thurlow area.  I'd eaten at one and had a bad experience, but I couldn't remember which place it was (there are two within a couple of doors of each other), so we thought we'd try out a place I knew I hadn't eaten at yet, Characters Taverna, right on the corner of Davie & Thurlow - 1103 Davie St. to be specific.  It had lots of patio space and seemed to have a good menu, so Shan and I found a shady spot and were attended by an older gentleman who was very kind and who, whenever he came to serve us, called us his "beautiful ladies."  We were amused and thought this was rather charming.

Starting off by quenching our thirst with nice iced tea, Shan decided to order a calamari starter.  And it was great!  We really liked the extra thick, extra yogurty tzadziki sauce the dish was accompanied by.  It was a very good starter.


We both decided to order the chicken souvlaki lunch, which, for $10 came with Greek rice, lemony roast potato, Greek salad, and pita bread.  OMG, the souvlaki was one of the best I've ever had!  It made me miss chicken, which I haven't been buying much of lately because it's so expensive.  This souvlaki was grilled to juicy perfection, and seasoned with lemon, garlic, and oregano in just the right amounts.  It was amazing!


Although I was full, I did get pulled into desert.  The server recommended Ekmek, which was described as a Greek tiramisu.  The description said it was "vanilla custard over orange soaked wheat biscuits, topped with freshly whipped cream and roasted almonds."  So I caved.  And man was it ever good!  It was light and not too sweet, and yes, did remind me of a tiramisu in a way.  I am definitely going to have to find a way to make this at home!


So, the food at Characters was fantastic, and so was the service.  The prices were very reasonable for lunch and the setting was very lovely.  I would definitely go back again.  Besides, I didn't mind being called "my beautiful ladies" at all! :)

Friday, May 18, 2012

Cooking with Betty Crackpot: Ranger Cookies

This is another childhood recipe we made when we needed a change from chocolate chip cookies - or wanted cookies in addition to chocolate chip cookies.  Ranger Cookies (I have no idea where the name came from) have a great texture since they have a bunch of textured ingredients in them, like the corn flakes (which we used instead of Wheaties) and coconut.  As the recipe says in its intro, these cookies are chewy on the inside and crisp on the outside.  Until the other day, I hadn't had these in years, and again, tasting them gave me a feeling of nostalgia.

Ranger Cookies, from page 135 of Betty Crocker's Cookbook, 1969 version

1/2 cup shortening (I used butter)
1/2 cup granulated sugar
1/2 cup packed brown sugar
1 egg
1/2 tsp vanilla
1 cup flour
1/2 tsp baking soda
1/4 tsp baking powder
1/4 tsp salt
1 cup quick cooking oats
1 cup Wheaties or Total (like I said, I used corn flakes)
1/2 cup shredded coconut

375F oven.  Cream, combine, scoop.  Bake about 10 minutes or until golden.  Yield is about 3 dozen.  I got about 2 dozen since I wanted a bit larger a cookie.

Awesome!  Good old corn flakes!

Saturday, May 05, 2012

Latest Bagels

Last weekend I made another batch of bagels and I have to say this was the best batch yet.  Previously, I amended the recipe to make 12 bagels instead of 10.  I said in that post that the next time I make bagels, I'll weigh the dough out and divide it by 12, and that's what I did.

The dough weighed 1.29kg and for 12 bagels, it came out to 108g per bagel.  Doing it this way made a huge difference.  The bagels were way more uniform in size, which made them much easier to shape.  And instead of shaping by poking a hole and then rubbing the hole between my palms, I focused more on stretching the dough instead.  As you can see, I got smaller holes in the middle, but I'm not overly concerned about that.  They're easier to make sandwiches out of if they don't have a huge hole in the middle.  The last change I made to this recipe was to skip the pepper altogether, and I have found that I prefer the pepper-less ones.

This has definitely been a learning process and finally I am getting these puppies to the place I want them to be!


Friday, May 04, 2012

Cream of Tomato & Dill Soup

This is the soup I made the other night that I made the cornbread to go with.  I've made this before and it's so easy and delicious...And I really don't even like tomato soup that much.  The aroma from this was so tantalizing that my roommate was drawn from a rather important phone conversation to come into the kitchen demanding to know what I was making that was torturing her so!

Unfortunately, I forgot to take a photo - my bad.  I don't know where my brain was because I did take photos of the cornbread.  Oh well!  Here is the recipe.

Cream of Tomato & Dill Soup

2 lbs tomatoes, peeled, then roughly chopped (de-seed if you feel like it; I didn't)
4 cups water, with an adequate amount chicken boullion dissolved in it (use veggie stock if you don't want to use chicken stock)
1 carrot, 1 onion, and 1 stalk celery, chopped
dill, to taste
1 cup half & half cream (10%)
2 - 3 cloves garlic, or to taste, grated

Saute the carrot, onion, and celery until soft.  Add tomatoes and water/chicken and bring to the boil. Add dill.  Simmer until all the veggies are soft. Add more dill as you feel necessary.  With an immersion blender, or in batches in a food processor or blender, whiz until smooth but still has texture; don't puree.  Add garlic.  Finish with cream and serve.

Sooooooooo good, let me tell you!

And I did a food pricing breakdown, too.  This soup cost me about $0.85/serving.  Way better than canned!

Thursday, May 03, 2012

Cooking with Betty Crackpot: Corn Bread

I needed something to go with a killer soup I made the other night (recipe upcoming) and decided to make cornbread.  I love things made with cornmeal.  My mom had a great recipe, but I doubt it came from Betty because this was underwhelming.  I even have a way better recipe. 

In typical Betty Crocker cake-ish fashion, you just dump everything into a bowl and beat the crap out of it.  But that wasn't the problem; it was just not very interesting.  I will admit to over-baking it slightly, which might have accounted for the dryness, too.  But, still, I don't think I'll be making this again.

Corn Bread (page 49 of Betty Crocker's Cookbook)

1 cup yellow cornmeal
1 cup flour
2 tbsp sugar
4 tsp baking powder
1/2 tsp salt
1 cup milk
1/4 shortening or butter (I used butter)
1 egg

Preheat oven to 425F.  Grease or line with parchment paper an 8x8" square baking pan.  Throw all ingredients in a bowl and beat the crap of out them ("blend for 20 seconds.  Beat vigourously for 1 minute").  Pour into pan and bake 20 - 25 minutes or until golden brown.

There are two variations.  The first is to make this into 12 muffins.  The second is "Double Corn Bread" which directs the baker to prepare a 9x9" pan, use 2 eggs, and stir in 1 can (7 - 8 oz) whole kernel corn, well-drained, into the batter.  This actually appeals to me more than the regular recipe.


Meh!

Wednesday, May 02, 2012

Grapefruit Scones

I have a confession: I love Cobs - love it.  And I live within walking distance of one, which is both a blessing and a curse!  They have great baking and great breads.  I love their cinnamon buns and I really love their scones.  I was walking by there the other day while running errands at the mall and of course I had to go and stare longingly at their products...but on a budget, I couldn't justify purchasing any scones, but I knew I had scone ingredients at home, so when I got home I got busy.

I have a great recipe for scones that has garnered me a lot of compliments over the years.  It's a lemon scone recipe that I've changed up to become orange scones, orange & blueberry scones, and probably some others.  Since I love baking with citrus, I decided to go with that theme again and make...grapefruit scones.  I did, after all, have a bunch of very nice, large ruby reds on hand.

Here is the scone recipe.  I have no idea where it originated, but I've had it for ages.

Lemon/Orange/Grapefruit/Citrus Scones

2 cups all purpose flour
1/3 cup white sugar
2 tbsp baking powder
1/4 tsp salt
2/3 cup cold butter, cubed
2 eggs
1/3 cup 10% cream
1 tbsp finely grated citrus zest
1/4 cup citrus juice

In a large bowl, whisk together flour, sugar, baking powder, and salt.  Cut in butter and sablé with fingers until mixture is crumbly.

In a separate bowl, whisk together eggs, cream, zest, and citrus juice.  Pour over dry ingredients and gently incorporate until you get a sticky dough.

Turn out onto a well-floured surface.  With floured hands, form into a ball and knead gently 8 times.  Place on parchment-lined baking sheet.  Pat into a circle 3/4" circle, then cut into 8 wedges.  Do not separate.

Glaze options: brush with citrus juice & sprinkle with sugar, or as I did, brush with an egg wash and sprinkle with citrus-flavoured sugar.

Bake at 350F until golden.

For the citrus sugar, I had 2 grapefruits zested.  I used half of the zest in the scones and shook the other half in a container with about 1/2 - 3/4 cups of sugar until well-combined (I credit my friend Jodi for giving me this idea).

These turned out great, though the scone itself could have used more grapefruit zest.  But they were a hit with my roommates!  The grapefruit sugar topping was awesome.  These scones are not the texture of Cobs' scones, which are more doughy.  I'm not sure which I prefer, but you can never beat homemade scones right out of the oven, that's for sure.


Tuesday, May 01, 2012

Cabbage Rolls

I had a hankering for these last week, and having some energy, I decided to get the ingredients and make them.  I also had a desire to start stocking my freezer with pre-portioned meals because lately my appetite has been up and down and sometimes I really don't feel like cooking.

Remember my epic cabbage roll day?  This is what I was kind of going for, only the cabbages at my local Wally World (where cabbage prices were the least expensive in my neighbourhood) were huge, so I only got one.  Turns out I could have used a second cabbage because I had enough ingredients to double the recipe.  Oh well.

This meal was interesting because I actually found a decent real butcher at Guildford Meats in the Guildford Mall.  Great find!  The butcher ground me up some fresh ground pork and even had something on hand called "bacon #2" which appeared to be the ends and scraps from bacon.  It was a great price so I got half a pound.

Again, I kept track of pricing.

3/4 lb ground pork = $2.67
3/4 of 1/2 lb of bacon #2 = $1.82
1 large cabbage (the sucker weighed over 4.5lbs!) $2.17
green pepper = $0.49
1 large can Heinz tomato juice $2.87
3/4 lb ground beef (1 lb = $3 at Wally World) = $2/25
rice, salt & pepper, and onions = I have no idea
total price excluding rice, salt & pepper, and onions = $12.27

I got 16 cabbage rolls, so that equals $0.76/roll or 8 servings at $1.53/serving.


I basically followed the method I got from Mr. Anchovy, which is outlined in the epic cabbage roll post.  Turns out I should have re-read that post before starting out because I had the same issue with mushy rice that I did that last time, and that really disappointed me.  Next time, par-cooked or raw rice!  Also, I found the tomato juice too thin as a sauce...Next time I might do a tomato juice-tomato sauce combination for a slightly thicker, richer sauce. 

All in all, not bad, but definitely needs improvement.  I was actually going to skip the bacon, but I'm glad I didn't because it adds such great flavour to the rolls.

My freezer is looking a little more full these days, which is a good thing!

Monday, April 30, 2012

Clam & Salmon Chowder

The other week I was lamenting on Facebook how difficult it is to live on a $50/week food budget, and one of my friends told me about two blogs she regularly uses that are focused on creating cheaper dishes for those on tight budgets.  I could live on $50/week if I wasn't buying baking ingredients all the time, though, but that's besides the point.  I'm not going without baking ingredients.  I am realizing how lucky I was in Rossland that my dad regularly contributed baking ingredients to my pantry since I baked things for him, too.  Ah well.  I do my best, and usually I succeed.

Anyway!  The two blogs I mentioned are Budget Bytes and Poor Girl Eats Well.  Budget Bytes is particularly interesting because the author does a comprehensive breakdown of her ingredient prices to get an accurate price per serving amount.  This inspired me to do some of my own calculating, just for interest's sake.

The other night I made a salmon and clam chowder for dinner.  The story behind the salmon is that I saw a package of ground salmon in the grocery store that looked perfect for a salmon burger.  But when I got it home to make the burger, I saw that the meat had not been ground properly and that is was in long thin shreds.  So froze it for a later use and decided to stick it into some clam chowder.

So here is what I used, the prices, and then the price per serving.  I got 8 servings out of this recipe and put half of it into containers for freezing.

2 cans clams @ $1.67 each = $3.34
half of one container of 10% cream = $0.86
carrots = $0.37
potatoes = $0.76
6 slices bacon (17 slices/package at $4.97/package = $0.29/slice) = $1.74
1 cup of whipping cream left over from another recipe = $1.39
fresh thyme left over from another recipe = $2 (approx.)
salmon = $2.79 (approx. - I didn't keep the receipt for this as I bought it a few weeks before I started keeping track, but this is what I remember it to be approximately)

total cost of chowder = $13.25
8 servings = $1.65/serving

Not bad, eh?  There is room for improvement, though.  But not bad at all.  And the chowder was good!

Sunday, April 29, 2012

T&T Takeout

The other day I was having one of those days where I was really, really hungry but didn't fancy anything in particular.  My appetite does this to me once in a while.  I was also out and about deep in the bowels of Surrey and knew I didn't have anything at home to cook since I hadn't had the energy to hike around to do my grocery shopping.  So, I decided to go and get some fast food.  But not at a fast food joint!  The only fast food I will partake in is Subway or Quizno's and I didn't know where either was located when I got the skytrain station at Surrey Central.  But I knew that at the big T&T Supermarket there they would have a lot of really tasty Chinese food on offer, since that location had a huge "hot deli" as they call it, plus sushi, plus other stuff.  It's always very busy.

After pondering all the options, which was very overwhelming, I went with the "hot deli", where they offer a very reasonable 3 dishes for $6.29.  When I ordered, the lady asked me if I wanted steamed rice, and I said sure.  Why not?  But when I saw the portions of the dishes I chose, I went with the 2 dish option for $5.49 since the rice was rather a lot.

I chose sweet & sour pork and a mushroom medley with veggies thingy.


The pork was very good.  Unlike a lot of very westernized Chinese place, this wasn't covered in a thick batter, just a very thin coating of something something.  It also was not a goopy sauce of fake neon red.  The pork was very tender and there were lots of peppers and pineapples in it.  The mushroom dish was outstanding.  Mainly consisting of shitake mushrooms - which I love! - it also had in it regular mushrooms, some baby corn, a tiny bit of onion and cabbage, and a nice, woodsy, mushroomy sauce.  This was a fantastic meal that totally hit the spot.  For the price I was very happy with everything.

This take-out thing might become a habit.

Wednesday, April 25, 2012

Brunch at White Spot

Saturday was the first nice day that fell on a weekend in a long time, so my roommate and I decided to go for a hike.  But we wanted to eat first and opted to go to one of our go-to places for cheap but cheerful food: White Spot.

I have said here before that I love White Spot.  They do great burgers and milkshakes and they do a decent Eggs Benny.  Since it was brunch and I wanted something hearty, I went directly to the brunch menu, pretty sure that I would order the Eggs Benny.  But then something caught my eye: the Santa Fe Breakfast Burrito.  The menu indicated that this was a new item, and here is how it's described on the menu and web site:

Your choice of fresh chicken breast or tender Canadian pulled pork, scrambled Omega 3 eggs, cheese, sautéed tomatoes and green peppers wrapped in a whole wheat tortilla. Served with our trio of sauces – avocado salsa, tomato salsa, cilantro sour cream and red nugget Smashbrowns™.

You know what, I said to myself, let's try something different for once!  So I ordered the burrito and waited with anticipation.

When my plate came, I was underwhelmed by the appearance of the burrito.  Here it is:

 Granted this isn't the greatest shot in the world (the lighting in restaurants in general is suckage and often pics come out crappy-looking), but am I crazy or is this not the most un-exciting dish you've ever seen?  I thought it was very plain and colourless.  I had thought that perhaps there would be cheese and/or sauce ON TOP of the burrito, or something to bring a little life and colour to the dish.  There was not.

The flavour of the dish was also very underwhelming.  Though there were onions & peppers in the filling, the innards of the burrito were poorly seasoned and bland.  It could have used something like a bunch of chili powder, or something flavourful.  Instead, there were the veggies, the chicken strips, the scrambled eggs, a tiny bit of cheese (this whole dish needed way more cheese in general!)  The salsa on the side was a great help; I just wished there was salsa or something inside the burrito.  The corn & avocado salsa was just OK - I'm not a fan of corn off the cob.  But even the salsa didn't have enough kick to it and the sour cream was pretty useless.

I must also say that this is the second or third time I've had these newfandangled red nugget "smashbrowns."  They are not very good!  In fact, they are very boring!  I would much, much rather have had a traditional hashbrown.

So, this was a disappointing meal.  And I'm disappointed that I'm disappointed.  Usually, White Spot is a sure bet - which is why I keep going there - but taking the risk this time and having something new just didn't pay off.  I'll be back to Eggs Benny or a burger the next time I go for brunch.

BTW, my roommate T had the chipotle chicken wrap and she really enjoyed it.  It's one of her faves.  Here it is:


I kept wishing during my meal that I'd ordered the same!

Tuesday, April 24, 2012

Cooking with Betty Crackpot: Chocolate Chip Cookies

It was only a matter of time before I made this recipe as part of this series.  I've been making this very cookie recipe since I was a kid and to this day I still think it's the best.  This was the first recipe I ever experimented with, replacing one of the fats with peanut butter to get a wonderful peanut butter chocolate chip cookie, and the summer I turned 16 I made a huge batch of these to take to a camp I was working at for the summer to share with the staff for break time.  That was when my mom declared "you have these down to a science!"  I had the exact timing down pat - 17 minutes (we were at high altitude) to the perfect cookie.

A couple of notes, though.  First, I never bake anything with chocolate over 350F, and this recipe says to bake at 375F.  Also, the original recipe says this makes about 7 dozen cookies and I have never, ever gotten that many out of it!  When I made these the other night, I got about 3 dozen.  To get 7 dozen out of this you'd have to make very tiny cookies.  And this time I did use shortening, even though I don't believe in baking with it, but I had some on hand and it was already softened so I thought, what the hell.

Chocolate Chip Cookies, from Cooking with Betty Crocker, page 136

2/3 cup shortening
2/3 cup butter or margarine
1 cup granulated sugar
1 cup packed brown sugar
2 eggs
2 tsp vanilla
3 cups flour
1 tsp soda
1 tsp salt
1 cup chopped nuts
2 packages (6 oz each) chocolate chips (I used about 1 1/2 cups)

Heat oven.  Mix thoroughly fats, sugars, eggs and vanilla.  Stir in remaining ingredients.  (The original recipe says here "for a softer, rounder cookie, add 1/2 cup flour" - I have never needed to do this.)

Drop dough by rounded teaspoonfuls 2" apart onto baking sheet.  Bake 8 - 10 minutes or until light brown.  Cool slightly before removing from baking sheet.

YUM!  So, so good, and again, very nostalgic for me.  These did not last long in this house, I can tell you that!

Monday, April 23, 2012

Pizza Dough/Foccacia/Bread Dough

Instead of ordering pizza while in Seattle, Jodi made a homemade pizza dough and we made individual pizzas for dinner one night.  There was a hunk of leftover dough, so we did something else with it another night.  But first, let me share the dough recipe because it's quite honestly one of the best homemade ones I've had.  The original recipe came from Jodi's copy of The Food of Southern Italy by Carlo Middione.

Basic Bread Dough For Making Homemade Italian-Style Bread, Pizza, and Focaccia (page 47 of The Food of Southern Italy)

2/3 cup warm water, not over 100F
1 1/2 tsp yeast, fresh or dry
3/4 tsp salt
2 cups bread flour
3 tbsp olive oil (added to the warm water)

The book has about three pages of directions, which I'm not going to go through.  Check out my bread baking tutorial instead!  The original recipe does say that this can be easily doubled or tripled.

For extra special flavour and a great aroma, Jodi adds garlic powder to the recipe.  This comes out light and airy and crisp, with big air bubbles reminiscent of ciabatta bread. 

Here are the pizzas we made!

Jodi's pizza

My pizza

As I mentioned, the third portion of dough was saved and refrigerated for another use.  So the next night, Jodi made an amazing garlic cheese bread with it.  OMG!  So good!


I'll be keeping this dough recipe handy for future pizza nights in my own house!

Sunday, April 22, 2012

Russian Iced Tea

This is another Jodi recipe, and I drank a lot of this stuff on my recent visit to Seattle.  This is a drink Jodi remembers from her childhood, but could never quite reproduce on her own, until she was at a bake sale at a local Russian Orthodox church, where the mixture was being sold.  She tasted, she thought about it, and now she has successfully recreated it at home.

Here is the recipe.

Russian Iced Tea

2 parts Tang
1 part sweetened lemon instant tea
1 part unsweetened non-lemon instant tea
1 part super fine sugar
ground cloves (Jodi says "not sure what a ratio here would be, I think I used about a teaspoon in a giant batch")
This is really delicious and the cloves really make the flavour unique and outstanding.  I also love burnt orange colour of the drink.  I'm not sure how I'll replicate this at home without access to unsweetened iced tea powder, which is something I've never seen before.  But I wonder if I could brew regular black tea and add the rest of the stuff into it to get a similar result.  Summer is around the corner and I am looking forward to experimenting!


Saturday, April 21, 2012

Lunch at Broadway Station Sushi

This week my friend Barb was in town, and she and I and another friend got together for lunch on Tuesday. The consensus was that sushi was in order (all of us being sushi fans) and our friend, who lives and works near Broadway and Commercial in Vancouver, suggested Broadway Station Sushi (1638 E. Broadway), where she'd had a good experience before.

We met at 1pm and the place was quite busy. But we had hit the tail end of the lunch rush so the place emptied out quite quickly. It took us a while to order because we were all chatty as we hadn't seen each other in about a month. Eventually we decided.

I had two rolls, the Jumbo Dynamite and the Salmon & Avocado. Barb ordered the Spider Roll and the Sunshine Roll. Our friend ordered the Spicy Combo. This restaurant makes sushi with brown rice if you request it, and both of my friends did, but I stuck with regular white rice.

My combo.

Spicy combo with brown rice.

Spider roll - excellent. I tried it and loved it.

Sunshine roll. I believe it had smoked salmon in it and I think the topping was a seaweed thingy. It was also very good.

Great meal! I now have another Vancouver sushi place to add to my list to return to!

Friday, April 20, 2012

Cooking with Betty Crackpot: Kitty Cat Cake!

Growing up with my mom's Betty Crocker cookbook from 1969 was a key element in creating my love for baking and cooking, and I've mentioned before on this blog how, as a kid, I just used to love to curl up with the book and look at the cake pictures. To a child, they looked marvelous. To me as a woman pushing 40, they look quite amateurish, but they still have a lot of charm to them. The cat cake (instructions on page 116) always tickled my fancy, and my mom and I did make it together. I don't have any photos of it, but I remember my mom using yellow smarties for the eyes and snipping lengths of black licorice for the whiskers. I did find a picture of the Betty Crocker version of the cake online, so that's what you see to the right.

Last weekend, while at Jodi's, Jodi decided it was high time to indulge in her own cat cake dreams and make the the cake herself, which she didn't have the joy of making as a child. She used the Silver White Cake recipe from page 94, and the recipe for that is HERE. The cake came out great; it's indeed very white and just like the Dinette Cake, it was fluffy and moist and plain awesome.

And now, let me present to you, Jodi's Kitty Cat Cake! She used Dots candy for the eyes and paws and piped on the whiskers with melted chocolate.

Cute, eh? The frosting is Betty's Chocolate Butter Frosting from page 125.

Betty Crocker's Chocolate Butter Frosting (page 125 of the 1969 edition)

⅓ cup soft butter or margarine
2 ounces melted unsweetened chocolate (cool)
2 cups confectioners’ sugar
1 ½ teaspoons vanilla
About 2 tablespoons milk

Mix thoroughly butter and cooled chocolate. Blend in sugar. Stir in vanilla and milk; beat until frosting is smooth and of spreading consistency.

Fills and frosts two 8- or 9-inch layers or frosts a 13x9-inch cake.

There was just enough frosting for the cat cake.

There you go! Another Betty Crackpot success!

Thursday, April 19, 2012

Amtrak Snack

So, it's been a while. It wasn't my intention to let the blog go for this long again, but stuff happens. I've been unwell, I went away for a few days, blahx3. But I'm back, and I have new content plans for the days to come. I spent 3 days in Seattle with Jodi, which of course meant a lot of great food, so you'll be hearing all about that.

In the meantime, while I get my act together, here are some visuals of what Amtrak has to offer in terms of food on their Cascades trip between Seattle and Vancouver. Last weekend was the third time I've taken this trip, but the first in which I've taken advantage of the dining car. Surprisingly, the menu was quite varied (chicken teriyaki bowl, enchilada bowl, lasagna with meat sauce, mac & cheese) and not outrageously expensive the way airplane food is. However, I kept it simple. I had chowder, a sandwich, and a drink, which came to $13.75.

The chowder was piping hot and very good! For a commercially made chowder, I was quite impressed! Very creamy, lots of clams, decent potato amount, and not overly salty like other commercially made chowders I could mention. The sandwich was a bust though; soggy as hell and not very fresh. The lettuce was toast as was the tomato. I wound up eating mostly the meat and cheese. Next time, I'll order something else to go along with my chowder.

In the end, I learned that the dining car is a good option if I can't pack my own lunch. I had been avoiding it, assuming the prices were outrageous. And while not super cheap, it wasn't like some of the overpriced slop I've been served on airplanes.

Monday, April 09, 2012

Flourless Chocolate Truffle Cake

I mentioned this dessert in yesterday's post, saying that it was our finale to quite the slap-up Easter dinner. Here is a shot of said Easter dinner! The T-bones were courtesy my roommate, T.


Now, onto dessert. The April issue of Canadian Living was just chock full of recipes I bookmarked. The beef bulgogi was one of them, in fact. This chocolate cake was part of the Passover menu in that issue, and I knew upon seeing it that this was destined to be a product of my kitchen sooner than later.

The recipe is HERE.

The results were stupendous. So stupendous, in fact, there just aren't words. This was rich, fudgey, decadent, and just plain fabulicious. It was so fabulicious it's ridiculously ridiculous.

It was easy to make, too, so there is a huge gratification factor for not a lot effort, too. The only minor issue I had was that the topping used water in it instead of cream. I suspect this has something to do with Jewish kosher rules, but if you're not worried about that, I'd make this with cream instead of water. This is because water does not mix with fat well, and there is butter and chocolate in this topping, and they didn't combine well. The butter kind of separated and left buttery streaks through the top. Flavour-wise, the topping was smashing (I upped the instant espresso powder a bit), but when - WHEN not IF - I make this again, I'll make the topping with cream.

T and I were over the moon with this, and since there were just two of us last night, there are plenty of leftovers. Yay!

Sunday, April 08, 2012

Cooking with Betty Crackpot: Scalloped Potatoes

This is my first time making scalloped potatoes, which is kind of pathetic at my age. I love this classic side dish, but for some reason it always seemed like too much for one person. Now that I live with two other people, maybe I'll make them more often. I decided to make them for tonight's Easter dinner, which was not ham. My roommate sprung for gigantic T-bone steaks, which we had with roasted asparagus and a decadent flourless chocolate cake that I'll get to in a future post.

Betty has two scalloped potato recipes, this one and a creamy version, for which you make a white sauce. This one below seemed simpler to make and it's what I recall my mom making. Mom used to, I believe, slice the potatoes in a food processor. I did mine by hand, and I also didn't peel the potatoes first since I like the peels and that's where most of the nutrients are.

Scalloped Potatoes, Betty Crocker's Cookbook, page 435

2 lbs potatoes (about 6 medium)
1/4 cup finely chopped onion
3 tbsp flour
1 tsp salt
1/4 tsp pepper
1/4 cup butter or margarine
2 1/2 cups milk

Heat oven to 350F. Wash potatoes; pare thinly and remove eyes. Cut potatoes into thin slices to measure about 4 cups.

In greased 2 quart casserole, arrange potatoes in 4 layers, sprinkling each of the first 3 layers with 1 tbsp onion, 1 tbsp flour, 1/4 tsp salt, dash pepper, and dotting each with 1 tbsp of butter. Sprinkle top with remaining onion, salt and pepper, and dot with remaining butter. Heat milk to just scalding; pour over potatoes. Cover; bake 30 minutes. Uncover; bake 60 to 70 minutes longer or until potatoes are tender. let stand 5 - 10 minutes before serving. 4 - 6 servings.


I also didn't finely chop any onion; rather, I did it my mom's way and finely sliced a whole small onion and added it to the layers of potato. I didn't get 4 layers out of mine, but only 3, probably because I used a slightly smaller casserole dish than what was called for. Also, I specially went and bought homo milk (3.25%) for this recipe as I was pretty sure my usual 1% wouldn't work so well.


I baked the dish on a cookie sheet lined with one of my silicone baking mats, and that was a good call because there was some overflow during the baking process. The top layer of potatoes got a little dry & crisp, but that wasn't necessarily a bad thing.

The verdict: delicious and successful! I will definitely make this again because it was really good. I don't know why I put this off as long as I did!

Saturday, April 07, 2012

Bagels Redux

I was nearing the end of my last batch of bagels, so this weekend I decided to make some more. I am determined to become a bagel-making queen! Again I used Rose Levy Beranbaum's recipe from The Bread Bible, but I did a few things differently this time.

  • I made 12 bagels from the recipe instead of 10. This worked very well and I was very happy with the size this batch came out as
  • I reduced the black pepper to 1/2 tsp instead of a full tsp. The last batch was too peppery. I might forgo the pepper altogether next time
  • I used a whole egg for egg wash instead of just the whites. Not a big change, but it worked just as well
  • most notably, I boiled the bagels for a longer time than I did previously. This, I think, was key in making them nice and chewy
  • I baked them at a higher temperature for a shorter period of time
  • I did half with sesame seed topping and half with coarse salt
I still need a lot of practice portioning and shaping the bagels. One of the reasons I decided to go with 12 bagels over 10 is that it was easier for me to eyeball the portions, but even with this change I had different-sized bagels. What I might do next time is weigh the dough out before portioning and divide the weight by 12 so I'll get the most consistent size. Shaping is still an issue, though it was better this time than it was before. Rolling ropes of dough, or making holes in dough like this, is not one of my fortés.


So, things are coming along. These should last me over 2 weeks, so I'll make more then.

Friday, April 06, 2012

Cooking with Kylie: Chinese Broccoli with Oyster Sauce

So, I needed a break from bok choy after the caterpillar incident last week, and I went back to Simple Chinese Cooking to find another veggie dish try. Now that I have easy access to a Chinese grocery store, I made a list of veggies Kylie cooks with in the veggie chapter of the book and went to the grocery store to look for them. I found gai choy, AKA Chinese mustard greens, but because I'm not a fan of mustard I kind of didn't want to risk it. Luckily, there was gai lan, AKA Chinese broccoli, in abundance. There were actually two kinds and it looked very similar to another choy of some kind, so I asked a produce staff member to A) help me pick the right veggie and B) explain to me the difference between the two types of gai lan.

The difference, apart from 30¢ in price, is that one gai lan was younger than the other gai lan, and the younger one would be more tender and less fibrous. That is the one I went with. It was $1.99/lb.

The method for this recipe is exactly the same as the method for the bok choy recipe.

Chinese Broccoli (gai lan) with Oyster Sauce, from Kylie Kwong's Simple Chinese Cooking, page 194

1 bunch Chinese broccoli
1 tbsp vegetable oil
2 tbsp oyster sauce
dash sesame oil
1 tbsp peanut oil

1. Trim 5cm/2" from ends of broccoli, cut bunch crossways into 3 lengths, and wash thoroughly.

2. Fill a large saucepan with water and bring to the boil. Stir in vegetable oil, add broccoli and simmer until bright green & tender - about 1 minute. Using tongs, immediately remove broccoli from water and place on platter. Drizzle with oyster sauce and sesame oil.

3. Heat peanut oil in small frying pan until moderately hot and carefully pour over broccoli. Serve immediately.

OK, I skipped step 3 all together because I don't do peanut oil, and I didn't bother adding any vegetable oil to the boiling water.


Chinese broccoli is very similar to broccoli rabe, but is only mildly broccoli-flavoured. I made this for my roommate and I tonight, and we both liked it. This is a completely new vegetable for me, and I think it's a keeper (providing I don't find any caterpillars in it). I told the produce guy I spoke to earlier that I might put it in soup, but the look on his face said that was a no-no. He told me they don't usually put it in soup, but rather stir fry it or boil it. Well, I might just add it to soup - probably some Mama noodles - anyway. But, whatever, this was another good side dish to add to my repertoire. Go Kylie!

Thursday, April 05, 2012

Pasta with Roasted Tomato & Garlic

There is a lot to be said for convenience foods. They are, well, convenient. I don't really have a lot of convenience food around because I prefer not to spend the money on them, but there are times when they certainly would be handy.

Last night, I got home late from an appointment that went overtime, and when I got in the door it was 7pm and I was famished. But, lacking frozen perogies, KD, and hot dogs, I went with my original plan for dinner, pasta with roasted tomatoes & garlic.

It took forever to cook and I didn't get to eat until well after Survivor was over!

But it was worth it.

Recipe HERE (scroll down a little).

LinkWithin

Blog Widget by LinkWithin